
Simply put, there are different inspection standards that exist for multifamily properties. A multifamily property is defined as any property that provides accommodation for more than one dwelling unit. Multifamily homes can be divided into two categories: (1) buildings with two to four units (residential) and (2) buildings with five or more units (commercial). State regulations, the authorities having jurisdiction (AHJ), and specific company policies also determine what is considered a commercial or residential multifamily property.
Currently, 38 states have implemented some form of regulation or licensure for home inspections. Most commonly, regulations define a home inspection as including properties with fewer than 4 dwelling units, though some states and AHJs set this threshold at less than 5 units. By this definition, inspections of more than four or five units are generally categorized as commercial property inspections, and the ComSOP should be applied. In regions without regulations, inspectors should establish their own company policies to discern when to apply residential or commercial SOPs for multifamily properties.
The American Housing Survey and the United States Census Bureau conducted a survey in 2021 which found that 31.4% of all residential units are classified as multifamily approximating to a number of 43.9 million dwelling units. These include apartment buildings, condominiums, townhouses, and mixed-use developments. Before inspecting these types of properties, inspectors should have an idea of how to approach this type of inspection and put company-wide protocols in place.
Inspecting Different Property Types: Townhouses, Condominiums, and Apartments
A townhouse is typically a group of residences that share common walls with their neighbors. A townhouse owner will usually own the land upon which the house sits. It is common for townhomes to be structurally tall and narrow as well as having multiple stories of living space per dwelling unit.
Condominiums are dwelling units usually located within a larger complex. Condominiums may have interior or exterior entrances and may be single or multiple stories in height. Condominium owners do not own the land but are part of a larger group of owners that pools resources to maintain the property. Condominiums are often referred to in the same vein as apartments.
An apartment is a dwelling unit in a building that is not owned by the occupant. The apartment unit is leased to residents by the owner of the building. The owner is responsible for the building overall. Apartment buildings are the most common type of multifamily inspection performed by commercial property inspectors. A commercial inspection of an apartment building will generally include all units within the building.
Rentals, townhouses, and condominiums may be larger than standard apartments and include the possibility of added complexities to the inspection process. The scope of inspection may vary based on the client and the division of responsibilities and ownership within the property. This article focuses on inspecting an apartment building.
Creating a Plan for Your Inspection
Every inspection begins with an interview between the inspector and the client during the initial contact days or weeks before the physical inspection. After this interview, the scope of the inspection is established and a written proposal should be prepared. An important question to consider asking the client is, “Would you like all of the apartment units inspected at the property or a specific number of units inspected?” The scope for an apartment building will also include the elements within Section 6 of the ComSOP, including the building’s exterior, parking area, roof, balconies or decks, and mechanical, electrical, and plumbing (MEP) elements. Always remember that inspections do not include removing obstructions or personal items.
Arriving on Site: First Impressions
Begin all inspections with a preliminary walkthrough that is methodical and organized. Depending upon the size of the property, the inspection could be performed by one inspector or multiple inspectors if present. Regardless of the size of the inspection team, the walkthrough provides an opportunity for the inspector to establish rapport with the individual granting access to the space, or even the client if they are present. The preliminary walk-through is an informal, initial survey of the entire property; it’s not a thorough assessment of building systems and components for your final report.
The preliminary walkthrough will help locate the hidden areas, such as access points to the roof, attic, basement, and crawlspace. It also offers a general overview of the building’s condition and highlights specific areas to focus on during the thorough inspection. Creating rapport with the individual granting access is crucial, as the inspector depends on this person for smooth entry and seamless navigation throughout the building. Learn more about the Preliminary Walk-Through Survey.
Beginning the Inspection: The Two Most Efficient Strategies
While each inspector is different and may have their own routines for inspections, most inspectors develop a routine along two main strategies:
- Exterior-to-interior with a top-down approach
- Interior-to-exterior with a bottom-top approach
An effective method for multifamily property inspections is the exterior-to-interior with a top-down approach. In this approach, start with the building’s exterior, beginning at the roof, then proceed to ground level, and finally move to the interior. Beginning with the exterior allows the client, residents, and building representatives to all settle into the inspection while staying productive and organized. Starting on the roof—the highest point of the building’s structure—also allows the inspector to follow moisture and water. Issues on the roof can lead to water traveling down the building’s exterior or seeping into the interior. Inspectors should already have an idea of potential roof problem areas from the preliminary walk-through survey.
When it’s time to transition to the interior, the inspector may either choose to inspect the main MEP systems and common areas first or begin with the individual units. An advantage to inspecting the MEP systems and common areas first is that residents can prepare for the subsequent unit inspections as well as help the inspector understand the MEP elements and design of the building. The interior approach will also depend on the inspector’s assessment of efficiency, as well as any stipulations or restrictions related to access and timing.
REPORTING NOTE: Some inspectors utilize reporting or note-taking software for capturing field information, but this can be time-consuming and labor-intensive. It may negatively impact efficiency and could increase the time spent in the field. Some inspectors choose to spend less time in the field and more time writing the reports back at the office.
Mock Inspection: Three-Story Multifamily Apartment Building
This building features a flat roof accessible via a fixed ladder and has 12 dwelling units. Each unit consists of a bedroom, bathroom, kitchen, and living room. While residents supply their own window air conditioning units, heating for the entire building is centralized by a boiler located in the basement with a communal laundry area. Additionally, there’s a 15-stall parking lot at the building’s rear.
The Roof
Aside from assessing the condition of the roofing membrane, the roof will typically include some of the HVAC equipment, gas distribution lines, and drainage systems. The inspector may choose to activate the thermostats during the preliminary walk-through to ensure each unit’s operation at the time of inspection. The inspector may also choose to coordinate this with any other inspectors on-site.
The Exterior
Once the roof is complete, the inspection continues to the building’s exterior at grade. Each inspection area shares a common theme: they comprise various systems and components that fit into diverse sections of the report. The exterior section of the report will include information about the building’s siding, parking area and flatwork, and lighting, as well as life safety components (i.e., fire access roads and fire hydrants), balconies and decks, and potentially the main electrical service and gas meters.
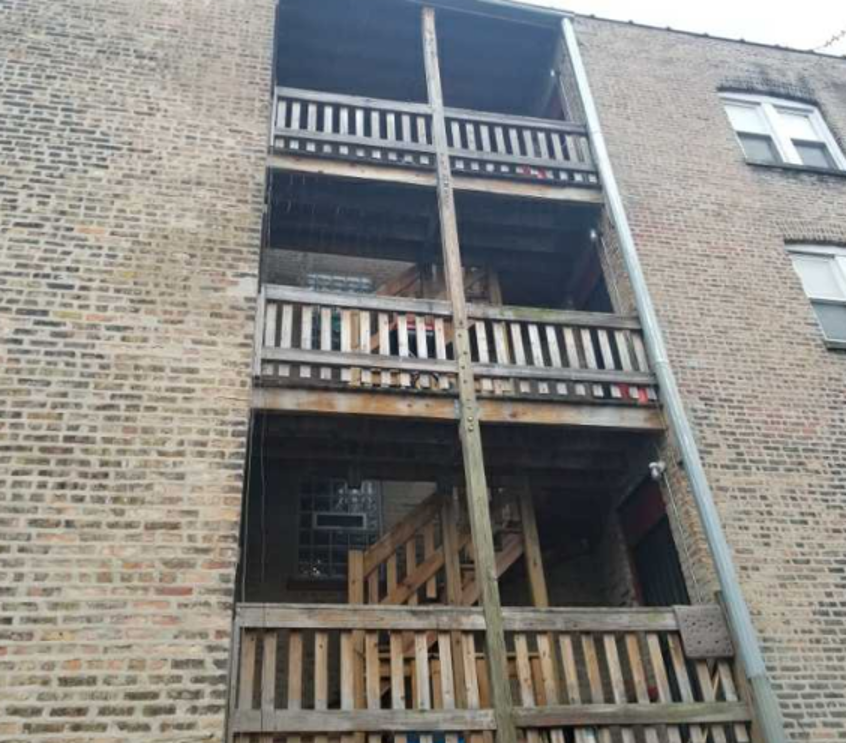
Exterior balcony and deck
The Interior: MEP Systems and Common Elements
For the interior, the inspection begins in the basement with the main MEP systems, and then onto the common areas as this gives residents notice and can help keep the inspection on track.
Boiler Systems
Some jurisdictions require inspections and licensing of commercial boiler units. Photographing the license and/or the inspection tag will help document the last inspection and provide the client with the vital piece of information and compliance.
A single boiler system will have one large boiler which typically has some form of controlled distribution to allow the 12 individual dwelling units to adjust their temperature settings. This could be through valves, pumps, or a combination of both. It is important to identify if each unit can control its own heating.
While inspecting the boiler, the inspector should look for signs of leakage, excessive rust, or any types of issues with the systems. It’s a good practice to take photos of the boiler from all four sides as well as the label plate. It’s important to include expansion tanks, pressure relief valves, pumps, controls, pipes, pressure-reducing valves, and any water valves in the photos. Even though these photos might not be used in the report, they could be helpful when describing the system.
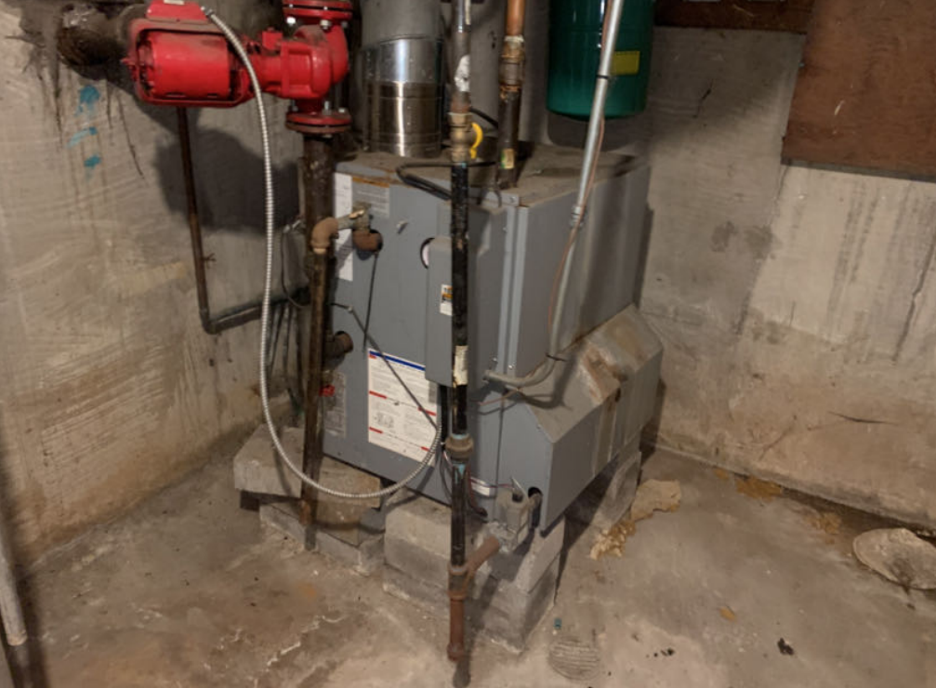
Boiler in the basement
As a side note, if a boiler isn’t present, individual units might have forced air furnaces. Other heating and cooling solutions installed in individual units include heat pumps and through-wall units, as well as electric baseboard heaters. Typically, these systems are regulated by residents with thermostats. It’s important to note that resident-owned window air conditioning units should not be included in the inspection.
![]()
Plumbing Systems
A commercial multifamily building should have a backflow preventer present at the main water source; however, some municipalities may not require one. The most likely location to find one would be near where the potable water enters the building. This valve should be photographed as well as a backflow device, if one is present. Remember to take a photo of any inspection tags that might be on the valve or backflow preventer.
NOTE: Some apartment buildings have one single water valve while others might have individual valves—one for each unit.
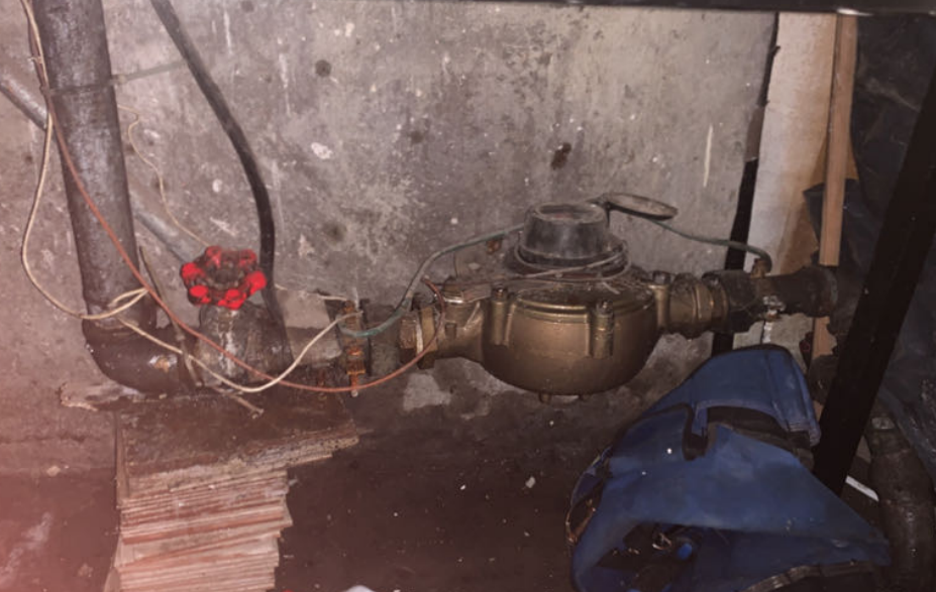
Water meter without a backflow preventer
Trace all exposed plumbing systems in the basement and take photos of any adverse conditions. The majority of the plumbing inspection will be performed during the interior inspection of each of the dwelling units.
Water heaters can be found in individual units located in the apartments, in a mechanical room, or in a larger community unit found in the basement. The smaller units located in each apartment can be typical residential-type units. These units could heat the water with natural gas or electricity. Each water heater should be equipped with a temperature pressure relief valve and a proper extension that discharges no more than six inches from the floor. If the water heater is located on any of the upper floors above the basement, a drip pan with the appropriate drain piping should be installed under each water heater.
Larger water heaters installed to service multiple units should be high recovery or commercial water heaters. These types of water heaters may resemble a standard water heater, but they recover or supply heated water more rapidly than the standard water heater. Using a standard water heater instead of a high recovery or commercial water heater to service multiple apartment units will result in a lack of hot water. A standard water heater does not produce enough hot water to service an entire building. The label on the side of the tank will indicate whether the water heater is high recovery or commercial.
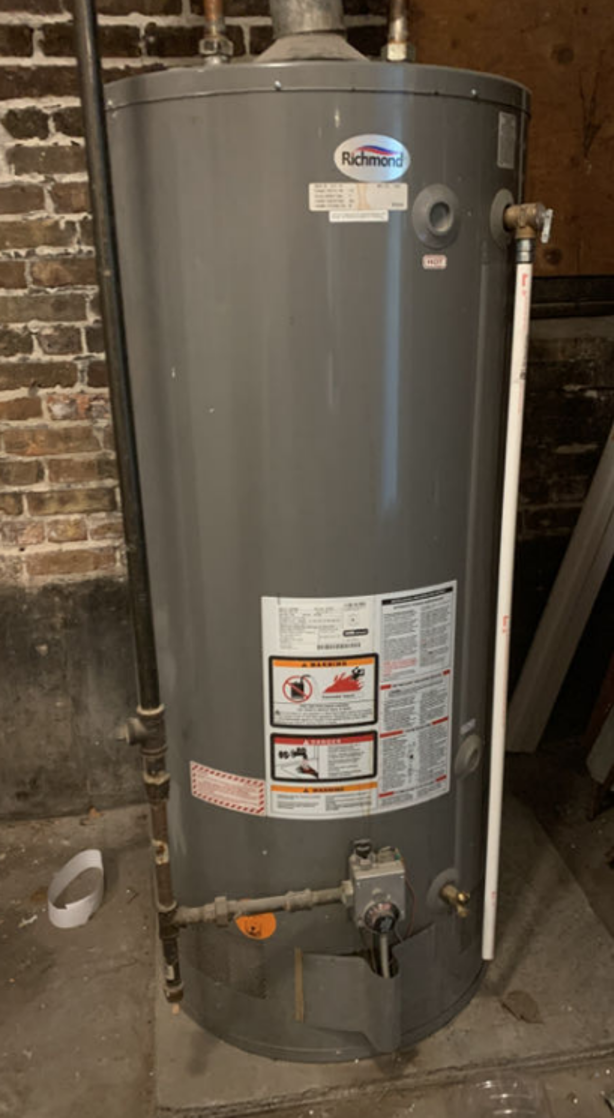
High recovery type gas water heater
Electrical Systems
There is one location where the electric service entrance comes into the building. There could be an overhead or lateral electric service on the exterior of the building or a lateral electric service on the interior in the basement. The panelboards for each of the dwelling units could be located in the basement, the exterior, or one in each of the units. Often there is a bank of meters and disconnects in the basement or along the exterior. It is configured in such a way to ensure that the entire building can be disconnected or shut off in one central location. There is a National Electrical Code (NEC) requirement that the entire building needs to be shut off in less than six means of disconnection. Be sure to photograph the disconnects, panelboards, and the service entrance.
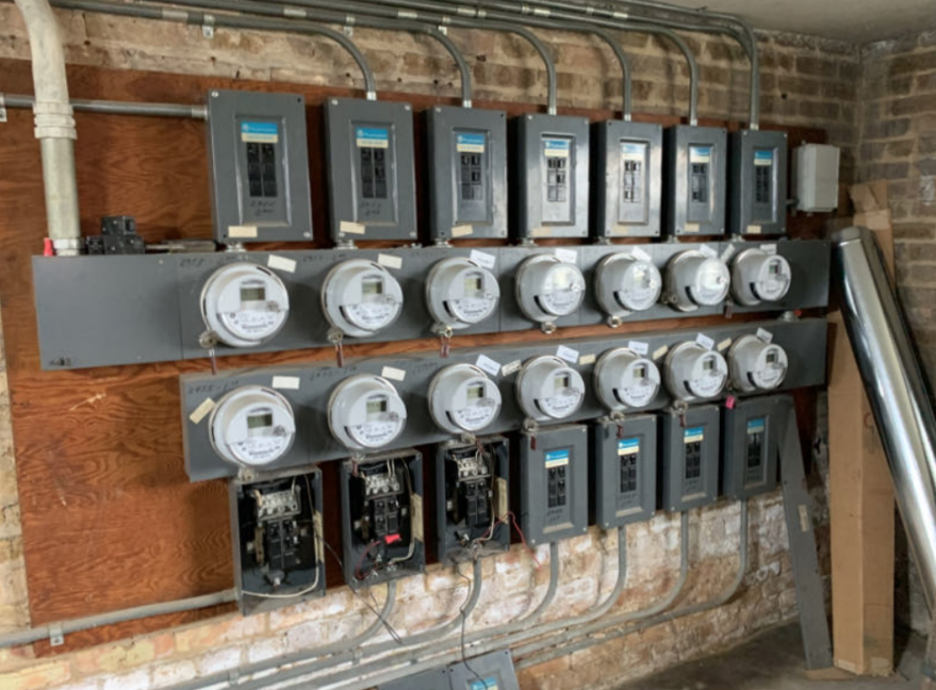
Bank of electrical panelboards and meters in the basement
Common Areas: Laundry, Hallways, Stairwells, and Elevators
Mechanical elements will be located throughout the building. There could be laundry facilities in the basement or on an intermediate floor. The laundry room may have a service sink, cabinetry, and counter space and should always have a fire extinguisher present and available.
Fire extinguishers, smoke detectors, and carbon monoxide detectors should also be present in the units. Each local regulatory agency will have a different adoption of the National Fire Protection Association (NFPA) 72 Standard. Identify the presence of at least one smoke detector in each unit, one in each mechanical room, and one in each common hallway. There should also be a working fire extinguisher in the hallways on each floor.
All means of egress and stairways, railings, treads, risers, landings, and undersides should be thoroughly inspected. Modern buildings may have exit signs and emergency lighting while older buildings may not. Make photographic notes and an inventory of the installed life safety devices and systems.
The inspection of elevators is beyond the ComSOP, but an inspector should nevertheless ride the cars to each floor to verify operation. Most inspectors will also photograph or secure the most recent inspection certificates and the interior of the cars during the inspection.
Unit Inspection
Arguably, the most challenging aspect of a multifamily property inspection is maintaining or dealing with the residents. It is important during the interview process to discuss unit access with the client. It is the client’s responsibility to make sure that access is provided to each of the units. The property manager or building representative should knock on the doors or unlock them to grant access to the units. This will create distance between the inspector and the residents as there will inevitably be residents who are not aware of the inspection. It is partially for this reason that an inspector should not be responsible for opening doors and making direct contact with the residents. Additionally, this method keeps the inspector in a neutral position, strictly an observer of the conditions—not a representative of the building.
The preferred method of access to the units should also be written in the proposal to prevent any miscommunication. In most cases, the client will notify the property owner and they will make individual contact with the residents.
Staying Organized: Documenting the Unit Inspection with Photographs
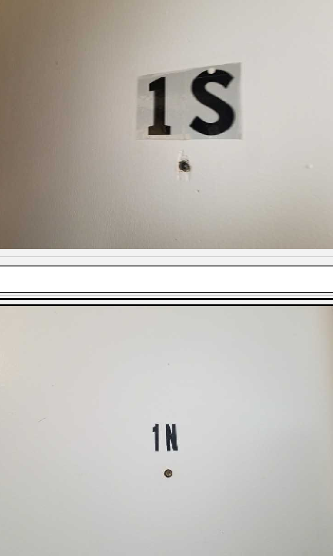
Photo of the unit numbers on the doors
Staying organized during the unit inspection can be a difficult task. One of the easiest ways to stay organized is through photos. The inspection of the interior of each unit encompasses a kitchen, bathroom, living room, and bathroom. Within those four main areas, there could be several photos of conditions or reference items.
Multiple dwelling units can make it very easy to confuse the elements and conditions discovered. If an inspector takes a photo of the entrance door and unit number before walking into the unit, then all of the photos taken between that door and the next unit door will be easily identifiable to a particular unit. The next photo of a front door will be the next unit that will appear in chronological order in the photo stream.
Kitchen Inspections
Begin the kitchen inspection with a broad or wide photo of the entire kitchen to capture the overall condition. Move to the sink and turn on the hot water. While waiting for the water to reach its hottest temperature, inspect under the sink for leaks or damage. As mentioned in the ComSOP, if the area under the kitchen sink is obscured due to the resident’s belongings, inspectors are not required to move any items and should do their best to focus on the areas that are available.
After testing the hot water, adjust the faucet for cold water. While still running the water, take a cursory look at the refrigerator, stove, and any other permanently installed appliances. Photos should be taken of any negative conditions for later use in writing the inspection report. When the kitchen inspection is finished, make sure the water is shut off and there are no leaks under the sink.
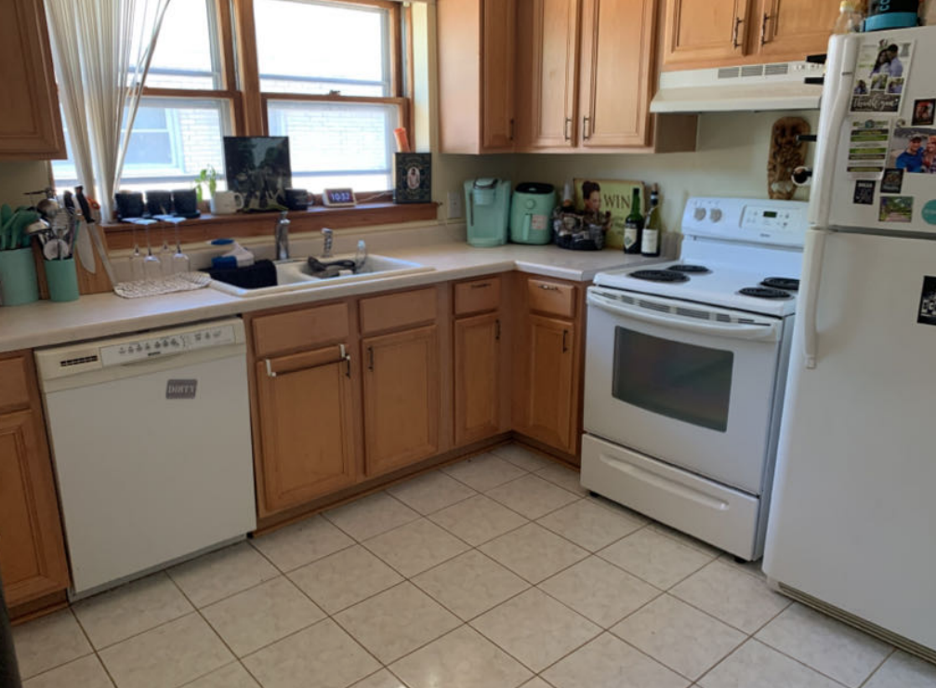
Abstract or wide view of the kitchen – identified as “Kitchen 2” in the caption on the report
Bathroom Inspections
Unless the door is already opened, always knock on a bathroom door before entering. A photo should be taken at the widest angle to show the entire bathroom condition. Begin by turning the hot water on in the tub or shower as well as the sink. While waiting for the water to reach the hottest temperature, inspect the toilet and other fixtures for cracks and leaks while also checking for proper adherence to the floor. Once the hot water is verified, switch the temperature to cold water and let it run. While the cold water is running, inspect the tiles that surround the bathing area. It is important to identify any missing tiles or areas where the walls are soft or damaged. Next, shut off the running water and inspect the sink for leaks. Photos of any adverse conditions should be taken, such as soft walls, soft floors, loose toilets, cracked sinks, and staining on the walls or ceilings. Lastly, verify the safe working order of the exhaust fan, window, ground fault circuit interrupter (GFCI) receptacle, and lighting.
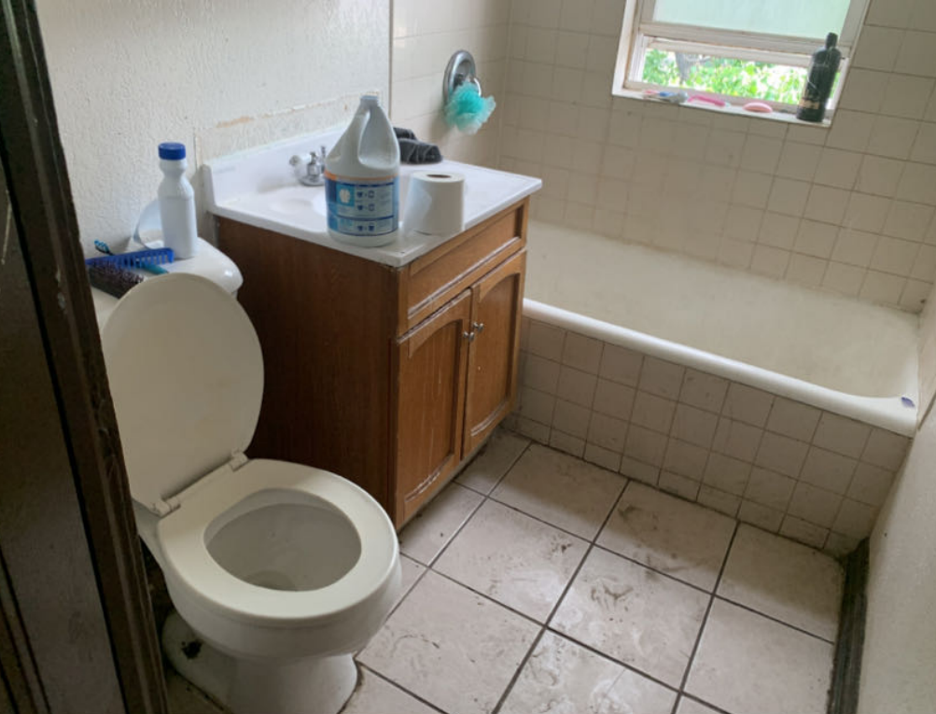
Wide or abstract view of the bathroom – identified as “Bathroom 3” in the caption on the report
Bedroom Inspection
Always knock and verify that no one is inside before entering any bedroom. While in the bedroom, look for staining on the ceilings, walls, or floors. Additionally, there should be a window in every bedroom that is fully operable and free of damage. Inspect all GFCI receptacles with a tester and, if this is not possible, take a photo to represent the present conditions. The door should open and close properly and be free of damage. Inspect smoke detectors in all bedrooms.
Living Room Inspection
The living room may be inspected last in the unit. There is often a smoke detector present in this room. If there is an electric panel in the unit, it is often located in the living room or the closet near the living room. A photo should be taken of the electric panel if it is present. If there is a balcony outside of the unit, it is usually located in the living room. Take note of any issues with the door to the balcony. Again, all outlets and GFCI receptacles should be tested, doors and windows opened and closed, and walls and ceilings noted for stains or water damage.
Remember that resident-owned window air conditioning units are not part of the inspection. Window and through-wall units are beyond the ComSOP. Some inspectors may choose to take a photo of air conditioning units as an inventory but the test operation is not necessary.
Inspecting the interior items in multifamily properties can sometimes be difficult. There could be a vast amount of personal items and furniture that may hinder access to certain parts of the unit, such as GFCI receptacles. As stated in the ComSOP, inspectors should not move any personal property. Depending on what is obstructed—e.g., panelboards, doors, closet floors, or windows—take photos and describe the limitations in the inspection report.
A Note About the Interior of the Units
Interior unit inspections should be efficient and fluid. It should not take more than a few minutes. If there are mechanical units like water heaters, furnaces, air handlers, and electric panels, the inspection will take longer.
Many apartment buildings or units within buildings can have varied degrees of maintenance or levels of cleanliness. It is important to document the conditions present at the time of the inspection and remain safe. Photos of these conditions will help provide the information necessary for a complete report.
Organizing the Written Report
It is important to write the report as soon after the completion of the inspection as possible. There are two main approaches to writing a multifamily inspection report: (1) cumulative or (2) summary style report.
Cumulative
Individual unit reports identify the units separately in corresponding sections. This is also known as a cumulative style report. A written individual unit report of our mock inspection would have 12 individual sections for the client to review—one for each apartment unit. The advantages of this method, if written correctly, are exceptional organization and thoroughness. The report would have 12 kitchen sections, 12 bathroom sections, and 12 interior sections containing the living room and bedroom information. This type of inspection report is excellent for communicating the findings of each unit; however, it can create a very lengthy inspection report.
Summary
With a summary style report, an inspector can consolidate the discoveries. This type of report would have one kitchen section in which all 12 individual abstract photos of the kitchens as well as photos of all issues found are present. The report would have one bathroom section, one bedroom section, one living room section, and so on. A summary of the conditions creates a report that takes less time and effort to read but still contains the essential information. An example of a bathroom comment might be:
“Toilets in units 1, 3, 5, 8, and 12 were found to be loose from the floor.”
If the report was created in a cumulative style, then the client would have to read five different sections to determine that there are five loose toilets rather than one single comment. Although this type of report style is lengthy, it is also thorough.
Of course, there are pros and cons to both types of reporting styles and one is not surperior to the other. The reporting style can be determined early on with the client.
Inspections of Multiple Buildings
Larger inspection projects can often come with the opportunity to inspect multiple buildings which provides its own challenges for the written report. The exteriors and common elements of each building may be represented by different materials, levels of maintenance, or physical conditions. This is why it is important to create a separate inspection report for each building. This will not only help keep the inspector organized but keep the client and the reader organized as well.
Conclusion
Multifamily properties can be an excellent opportunity for commercial inspectors. These are the closest commercial properties to a residential inspection and rely on most of the same skills. These inspections also allow commercial inspectors to get larger projects that they might not otherwise be able to perform alone.
For commercial property inspectors who wish to venture beyond multifamily property inspections, consider providing reserve studies. These are cost aggregations that help building owners and homeowner associations maintain their costs and maintenance budgets.
Article Written By: Rob Claus, CMI®
Additional Resources for Commercial Property Inspectors: